The Magic Behind the Photos: Unveiling the Photo Editing Process


Introduction
When you see a perfectly lit portrait or a stunning, color-punched family photo, it’s easy to assume the magic happened entirely in front of the camera. While light, composition, and directing play a huge role in making beautiful images, an equally important part of the creative process happens after the session, during the photo editing stage. Behind every professional image is a detailed editing workflow that enhances colors, refines details, and brings out the best in each shot.
In this post, I’ll walk you through what happens behind the scenes once your session is over. From basic adjustments to more detail-oriented retouching, I’ll show you before-and-after examples to illustrate how a good edit can elevate a so-so photo to a keeper and a good photo to a great one.
Whether you’re wondering why professional images look so polished or just love a good before and after series, this post will give you an inside look at the artistry that goes into every final image.
What Happens After the Photo Session?
Once your photo session wraps up, the quieter, behind the scenes work is just beginning. The first step is the not-very-exciting task of transferring your image files to the computer where the editing will take place. The files get organized, backed-up to ensure nothing ever gets lost, pulled into editing software (I use Adobe Lightroom), and are then ready to be culled.
Professional photographers typically take multiple shots of the same pose or scene, in an effort to capture the best expression and composition. Looking through these photos and carefully selecting the strongest images is called culling. Culling eliminates redundant photos, out-of-focus shots, or photos where someone may have blinked. The goal of culling is to curate a tight set of the strongest images that tell your story beautifully.

View of culling process using Adobe Lightroom.
Once I’ve culled the final set of images, I move into the editing phase, where the transformation begins.
Basic Adjustments: The Foundation of a Strong Photo
Before diving into detailed retouching, I start with basic adjustments to ensure that each image has the correct exposure, color balance, and composition. Professional photographers shoot their digital photos in a RAW file format. The RAW format is essentially a digital negative and allows for more leeway in the editing process. But even with the most ideal light, RAW image files straight from the camera have a tendency to look flat and have muddy colors. Working through basic adjustments will add back in that vibrancy that gets lost when shooting in RAW.
Key Basic Adjustments Include:
Exposure Correction – Adjusting the overall brightness and making adjustments to the tonal curve to create the right amount of contrast.
White Balance – Correcting the color temperature and tint of the image to ensure natural skin tones and accurate colors.
Cropping & Straightening – Refining the composition and eliminating distractions from the edges, as well as straightening horizon lines.
At this stage, the goal is to create a well-balanced image with clean, correct color that lays the foundation for further refinements. Below, you’ll see a top-to-bottom comparison of an unedited image and one with basic adjustments applied. Even these subtle changes can make a big impact!


Notice the exposure has been bright down a bit, the tonal curve has been manipulated to create more contrast, and the image has been straightened and cropped.


This image has also had the exposure brought down and some contrast added, but the cropping out of distracting elements has biggest impact.
Subject Retouching Makes People Look Their Best
Once the image has had the base layer of basic adjustments, I move on to retouching. Retouching involves fine-tuning the details that create a more elevated, professional look to photos. I’m not someone who does a lot of Photoshop-style transformations and liquefactions, swapping out heads and adding fake layers to the background. I’m more naturalistic in my editing approach, choosing to enhance what is already there.
Common Subject Retouching Techniques Include:
Skin Smoothing – Softening or removing minor blemishes while keeping a natural skin texture intact.
Removing Distractions on Subjects – Eliminating flyaway hairs, lint on clothing, or any other small visual distraction that takes away from the image.
Lighting Enhancements on Faces – Using a brush tool to gently brighten the eye area or other areas of shadow on subjects’ faces.
Subject Masking – Adjusts the overall brightness of a subject, separate from the brightness of the background.


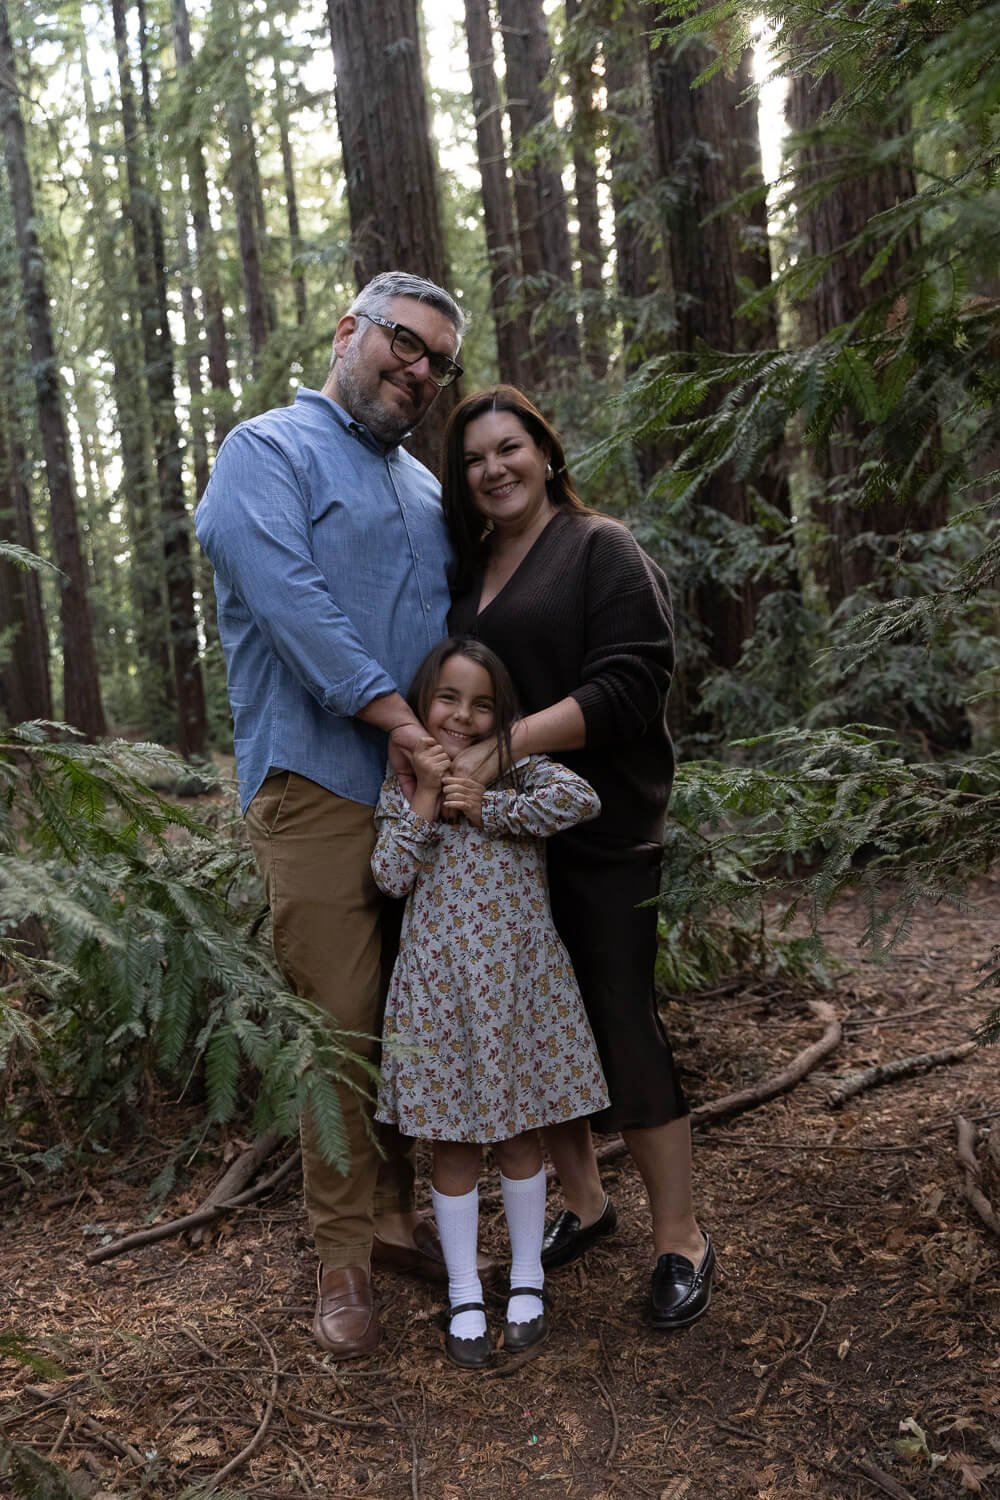
Notice the bug bites have been removed from the child’s face, the white balance has been corrected (warmed), the reflected side of the subject has been brightened, and the image has been slightly cropped.


White balance adjustments, cropping, contrast enhancements, and spot removal make this potential throw-away photo a lot more interesting.

Subject masking allows me to bring up the exposure on the subjects, while keeping the exposure of the background the same. This allows the subjects to “pop” more in the image.
Global Retouching and Color Enhancements
For many images, I take editing a step further by doing retouches on the whole image (not just the subject) and making color enhancements. Many images benefit significantly from these kinds of enhancements. This is also the stage that allows for more expression of my own artistic vision. These edits may include:
Removing Objects that Distract – Eliminating unwanted elements in the image like a passerby or parked car in the background.
Color Grading – Adjusting the hue, saturation, and luminance of specific color channels and tones in the image.
Converting to Black & White – Applied only after basic adjustments and retouching happen.
Creative Enhancements – Softening backgrounds, adding radial and linear adjustments to certain parts of the image, and other small tweaks to make the image sing.


Putting it all together, creating layers of basic adjustments with more detailed and advanced edits allows images to really sing. You can see more family images that have had similar editing here.


Before converting to black and white, basic adjustments and retouching need to happen first.
Why Hand-Editing Takes Time
As mentioned above, each image goes through multiple steps after the session concludes — from culling and basic adjustments to retouching and final refinements. Depending on the number of images in a session and the complexity of edits required, this process takes anywhere from a couple of hours to a full work day (or more!). Unlike applying a quick filter or slapping on a preset, hand-editing is customized to each image, ensuring that the color, contrast, and skin tones look natural and consistent across the entire set and the distracting imperfections are removed. Professional hand-editing should bring out the best in each photo, without changing the way you look and while keeping everything looking natural, classic, and timeless. You want your images to be beautiful now and in 10 years, when trends have changed.


Top image: hand-edit, middle image: trendy “film-emulation” filter, bottom image: straight off of camera
Gallery Delivery
Once all the final images have been lovingly edited, it's time for the gallery delivery! 😍
From Lightroom, I export the images in high-resolution. This ensures the images look rich and sharp whether they are viewed on a screen or printed as wall art. The photos are uploaded to a private online gallery, and this is how you experience your images. From this gallery, images can be downloaded for printing and sharing.
I also provide guidance on how to get the best prints from your photos, from recommending the best professional print labs to considerations on print sizing and aspect ratios. I even have a built-in print shop in every gallery for anyone wanting the convenience of clicking a few buttons and knowing they’ll get high-quality prints and walk art. Ordering prints from reputable print labs ensures that the colors, sharpness, and overall look of your images remain true to the final edited versions you see in your gallery.
My hope is that your final, edited images are not only beautiful but also easy to access, enjoy, and preserve for years to come.

This image looked very different before editing.😉
If you’re in the Bay Area and looking for a photographer who not only captures knows how to shoot beautiful images, but also has more than a decade of experience doing the thoughtful hand-editing process described above, I’d love to work with you! Feel free to reach out to book a session or ask any questions about the process.